
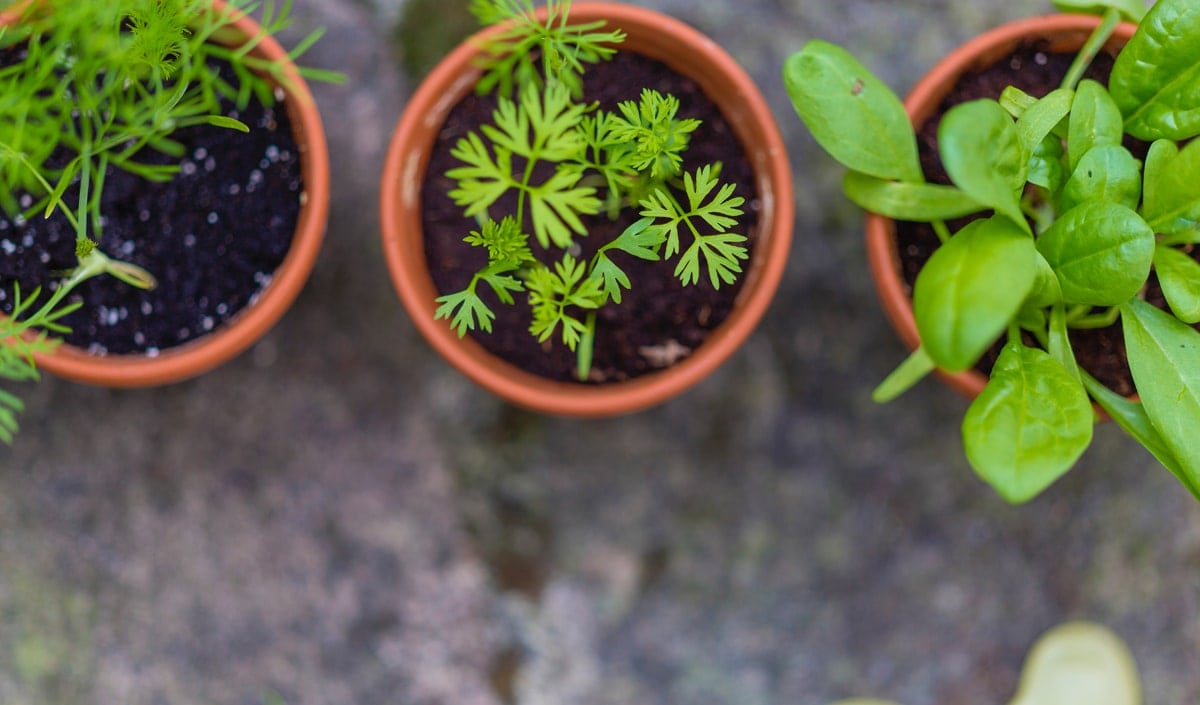
Growing plants in pots and containers is a great way to brighten up patios, terraces, balconies and driveways. Whether you prefer colourful flowers or leafy perennials (or indeed a mixture of both!), there are plenty of plants to choose from.rom.
Many plants are suitable for container gardening, and part of looking after potted greenery is knowing how and when it’s time to repot plants.
Why Do We Need to Repot Plants?
There are several reasons why container plants need repotted. The most common is that the plant is outgrowing its pot. You’ll know this has happened when the plant becomes root bound or the roots are growing out through the pot’s drainage holes. Roots tightly packed into a too-small pot can’t absorb moisture and nutrients effectively, stunting growth. In the ground, roots can spread and stretch to find nutrition, but pot-grown plants don’t have that option and can stagnate in containers. Repotting the plant into a bigger pot gives it more space to grow and mature.
Soil quality is another reason to repot plants regularly. The longer a plant remains in the same pot, the more nutrients it absorbs from the soil. Eventually, the compost will become drained of goodness, needing replaced with fresh compost bursting with nutrients.

How Often to Repot Outdoor Plants
As a general rule, outdoor plants should be repotted every one to two years. You may need to repot a particular plant more often, but don’t worry – you’ll soon be able to recognise the signs of a plant that needs repotted.
What Time of Year to Repot Garden Plants
Ideally, container plants should be repotted during mid-spring or summer when they are actively growing. Repotting at this time of year allows them to settle into their new pot and take up whatever they need from the soil. Plants can be repotted in the autumn or winter months if need be but you’ll notice a speedier recovery during the growing season.

Signs an Outdoor Plant Needs a New Pot
- The soil looks and feels dusty or dries out quickly.
- Water flows straight through the compost without any resistance.
- Roots are growing out through the holes in the bottom of the pot or above the soil surface.
- The roots are tightly packed, and when you lift the plant out, you can hardly see soil for the roots.
- The plant has stopped growing before it has reached its expected size.
- The plant looks top heavy and too big for its pot.
What Size Pot Should I Use?
While it may be tempting to go straight to a massive container and skip repotting for a year, using a much larger pot can be counterproductive. If the pot is too big, the plant will focus most of its energy on spreading roots rather than growing foliage. Which means your plant won’t look as lush as you might like. Instead, opt for a pot 2-4 inches bigger than the original one. Doing this provides space for the roots to spread without sacrificing foliage growth.
If you have a huge pot that you love, consider planting a few complementary plants in it together. As long as they have the same soil, light and feeding requirements, there’s no reason why you can’t place more than one plant in the same pot. In fact, it’s a great way to add interest and structure to a container garden.

How to Repot an Outdoor Plant
Examine Plants Regularly
Regularly take some time to check plants for signs they need repotting. Look at the root ball, check the quality of the soil and consider the plant’s growth. The first step to repotting garden plants is to know when the time is right. Choose a dry day and avoid repotting in windy weather.
Prepare the New Pot
Choose a pot that is the correct size for the plant to move into. The new pot must be clean and free of any debris that might spread pests or disease onto its new inhabitant. Brush away any leftover soil from previous use and wash the pot using warm soapy water – dish detergent is perfect. Ensure the pot has adequate drainage holes to let excess water flow away effectively and help prevent the plant from developing root rot. You may need to get the drill out to create more holes in the bottom of the pot. A mesh screen or coffee filter will help prevent soil from leaking through larger holes.
Remove the Plant from its Current Pot
Squeeze or tap the side of the pot to loosen the soil and roots and make it easier for the plant to slide out. Wet soil is more difficult to remove, so wait a week or so after watering if possible. You might need to use a trowel to cut down through the soil around the edge of the pot to free it.
Examine the Root Ball
Take a little time to examine the root structure. The roots should be light in colour – if they appear black, they may have succumbed to root rot. Use a sharp knife and trim the plant’s roots to remove symptoms and promote healthy growth.
Gently tease the remaining roots apart with your fingers, and dust off as much soil as possible. If the roots have become very tightly packed, you might need to get the pruning shears and cut off the bottom third. As long as you don’t get too scissor happy, this won’t harm the plant and will, in fact, promote new growth.
Add Soil to the New Pot and Position Your Plant
Add a few inches of soil into the bottom of the new pot, firm it down slightly, and place the plant in the centre, holding it up straight. Check the base of the plant is in the correct position so that the soil level remains the same as before. You may need to take the plant back out and add more soil underneath if the plant is positioned too deep in the pot. The top of the root ball should sit just below the rim of the pot.
Backfill Around the Plant with Fresh Potting Soil
Once the plant is in position, use one hand to hold it steady and backfill around the sides with peat-free compost. Firm the soil down as you go to help prevent air pockets from forming. Add some compost to the top of the root ball to ensure the soil level is the same as before. Be sure to leave room at the top of the pot so it can hold enough water to thoroughly moisten the soil.
Water
Give the newly repotted plant a good soaking, aiming the water flow at the soil rather than the foliage. Collected rainwater is best for watering outdoor plants, but tap water is fine. If using tap water, try to let it sit out for at least a few hours before using it to allow any chemicals evaporate first.
Keep an eye on the ground to check the drainage holes are sufficient for excess water to drain away freely. When you see water draining away, you’ll know the soil is completely moist.

Caring for Container Plants
Pot plants generally need a little more TLC than those grown in the ground. Because the amount of compost in the pot is limited, it needs to be changed occasionally so the potted plants can take up all the nutrients they need to grow.
Watering
Container plants also need watering more often since the roots can’t extend further into the ground to seek out moisture. Obviously, larger pots need more water to saturate the compost. Check containers regularly and water frequently during the summer when the weather is dry.
Feeding
Most plants benefit from regular feeding during spring and summer. An all-purpose fertiliser does the job just fine, but you may wish to use a specific feed for certain plants. Apply the fertiliser when the soil is moist so the plant can soak in the nutrients effectively.
Temperatures
Container gardens may need additional frost protection during the cooler months of the year. Add mulch to the top of the pot and cover with bubble wrap or insulating fleece to help protect the roots against frost damage.
Other articles from totimes.ca – otttimes.ca – mtltimes.ca


You must be logged in to post a comment.